Managing sales and contacts
À l'issue de ce chapitre
- keep a clean file of third parties, with their people and their addresses;
- draw up a quotation, enrich it with commercial documents and send it;
- turn a quotation into an order and trigger the delivery;
- apply a discount policy and analyse sales.
This chapter covers the whole sales cycle: keeping the file of third parties, drawing up quotations, turning them into orders and triggering deliveries.
Managing contacts
In Odoo, contacts cover all third parties: customers, prospects, vendors, subcontractors, institutions. A single database feeds every app, which avoids parallel files and diverging addresses.
People and companies
A radio button at the top of the form, which carries no displayed label, distinguishes two kinds of contact:
- Company: a legal entity: business, association, public body.
- Person: a natural person. A person can be attached to a company: the Company field appears as soon as the Person type is selected.
This link builds the hierarchy of people within a single customer: the purchasing department, accounts payable, the technical manager.
Note
Odoo has no "is a customer" box and no "is a vendor" box. The role follows from activity, through two counters carried by the record: posting a sales invoice raises the customer rank, posting a purchase bill raises the supplier rank. The Customers and Vendors menus only display the records whose corresponding counter is above zero, and the same third party can of course appear in both.
The detail of the mechanism (when the ranks go up, what resets them to zero) is given in section 10.1.5.
Astuce
Creating a contact from the Contacts app leaves it out of both lists until an invoice is posted in its name. For it to appear among customers straight away, create it from Sales › Orders › Customers.
Creating a contact
- Open the Contacts app and click New.
- Choose the type: Company or Person.
- Fill in the name: this is the label that will appear everywhere in the database. The field is mandatory.
- Complete the Address, the email address and the phone number.
- Fill in the Tax ID, used for tax identification and for checking legal statements.
- For a person, fill in the Job Position held.
- Add Tags to classify the contact.
- Save.
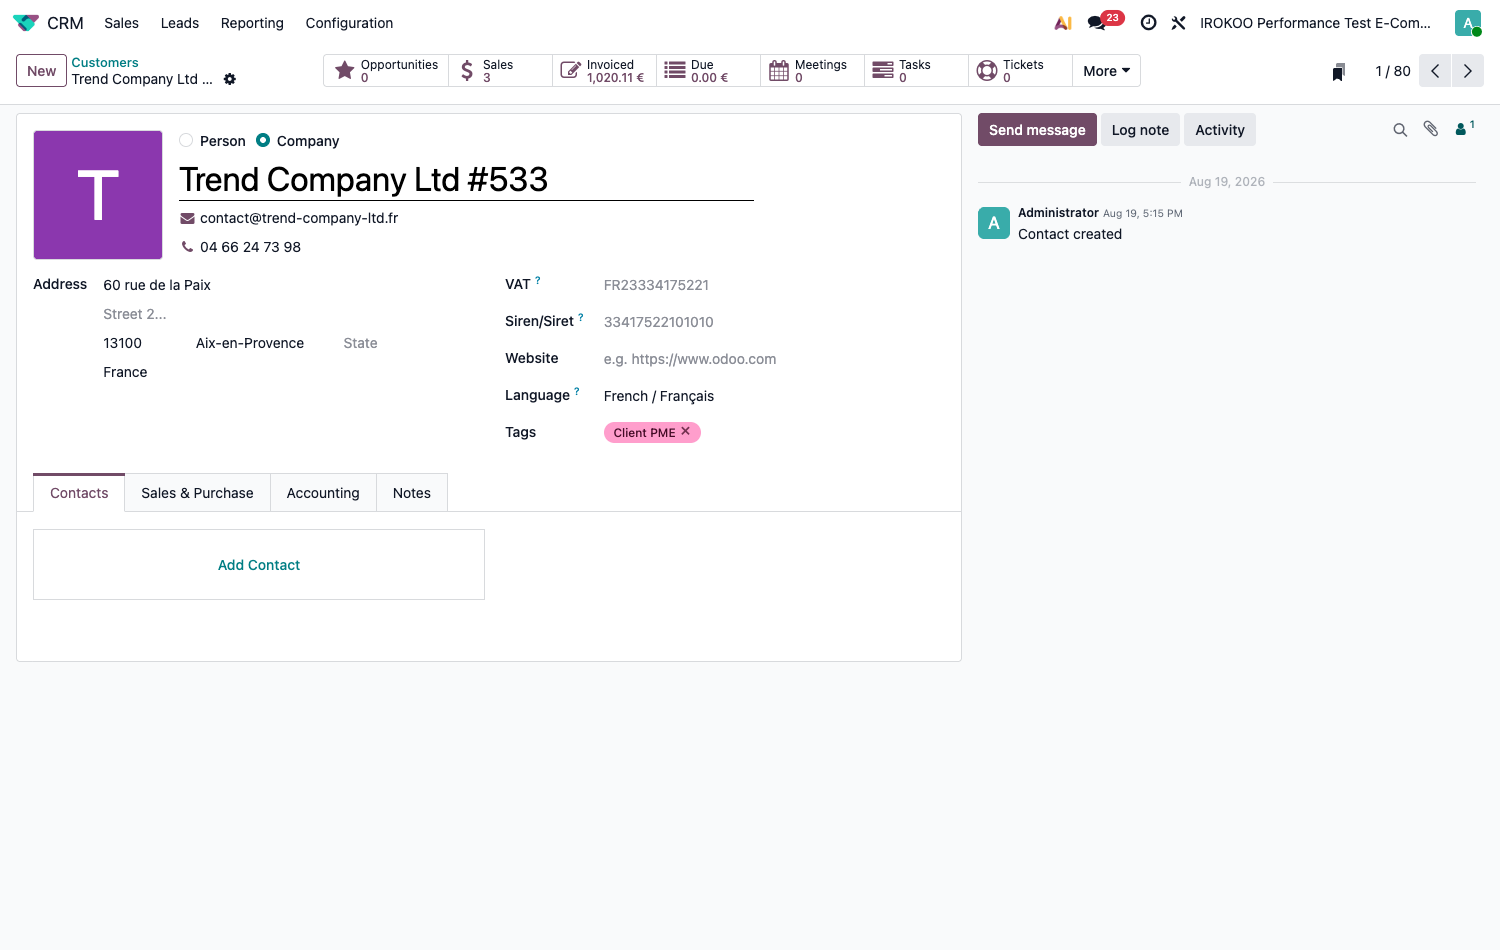
Adding people and addresses
A company generally has several people and several addresses: head office, delivery, invoicing.
- Open the company record.
- Select the Contacts tab.
- Click Add Contact.
- In the Create Contact window, choose the nature of the entry: - Contact: a named person, with their job position and their direct details; - Delivery: a delivery address; - Invoice: an invoicing address; - Other: any other address.
- Save.
Note
Delivery and invoice addresses are offered automatically when a quotation is created for this customer, which saves re-entering them and getting the wrong site.
Entering the commercial conditions
The Sales & Purchase tab of the contact record carries the settings that will be applied automatically to its documents. It is split into blocks, three of which concern selling.
Sales, what is carried over onto quotations and orders.
| Field | What it determines |
|---|---|
| Salesperson | The salesperson responsible for the account, carried over onto quotations and used as an analysis criterion. |
| Payment Terms | The credit period granted, which computes the due date of invoices. |
| Payment Method | The usual means of payment: transfer, direct debit, cheque. |
| Pricelist | The applicable price list, which determines the prices offered on their quotations (see section 9.6.1). |
| Delivery Method | The carrier and shipping mode used by default. |
Fiscal Information: the Fiscal Position adapts taxes to the customer's regime: exemption, reverse charge, rate applicable in their country. It is what automatically substitutes the right tax for the product's own. How it works is detailed in section 12.2.4.
Misc: the contact's internal Reference, the Industry for segmentation, and the link to a Company in a multi-company environment.
Astuce
Fill in the Fiscal Position, the Payment Terms and the Pricelist as soon as the customer is created. These three fields remove the main cause of errors on documents: an unsuitable tax, a wrong due date or a price outside the scale, spotted after sending.
Note
These settings are default values, not constraints: they are carried over onto the document when it is created and remain editable line by line. Changing a contact's pricelist does not recompute quotations already drawn up.
Note
The Inventory block, visible only in developer mode, carries the Customer Location and the Vendor Location, which designate the virtual locations where goods enter and leave for this third party. They are filled in by default and are only changed in particular logistics setups (see chapitre 16).
Merging duplicates
- Open the contact list in list view.
- Tick the records to be merged.
- Click Actions then Merge.
- Designate the record to keep and confirm.
The document history of the absorbed records is carried over onto the record kept.
Configuring sales
- Open Sales › Configuration › Settings.
- Enable the options you need: - Quotation Templates: pre-configures recurring offers; - Default Quotation Validity: number of days after which an offer expires; - Online Signature: lets the customer accept the quotation from their browser; - Online Payment: allows a down payment to be made on acceptance; - Discounts: enables the discount column on the lines; - Margins: displays the margin on quotations; - Lock Confirmed Sales: prevents modification after confirmation; - Sale Warnings: displays a message during entry for a given customer or product; - Delivery Methods: enables the computation and invoicing of shipping costs; - Units of Measure & Packagings and Variants depending on the catalogue.
- Save.
Invoicing policy
It determines the quantity Odoo carries over onto the customer invoice: the one that was ordered, or the one that was actually delivered.
The Invoicing Policy field in the settings sets the value used when a product record is created : Invoice what is ordered or Invoice what is delivered. The setting that actually applies is the one carried by each product, in its General Information tab below the product type: Ordered quantities or Delivered quantities.
Point d'attention
Changing the general setting changes nothing on products already created. On an existing catalogue, the change is made product by product, or through an update import (see chapitre 22).
Note
Invoicing on delivered quantities only makes sense for goods that pass through stock. For a service, invoicing on ordered quantities is the expected behaviour, unless time spent is being tracked.
Astuce
It is the exact counterpart of section 10.1.4 on the purchase side: one drives what you invoice, the other what you pay. Setting them consistently on the same item avoids invoicing a customer on order what you pay the vendor on receipt.
Drawing up a quotation
Creating the quotation
- Open Sales › Orders › Quotations.
- Click New.
- Select the Customer: their payment terms, their fiscal position and their pricelist apply automatically.
- Check the Invoice Address and the Delivery Address, taken from the contact record and editable if delivery is made elsewhere.
- Check the Quotation Date and the Expiration, beyond which the offer is no longer valid.
- Add the product lines: quantity, unit price, discount if any.
- Check the taxes and the total.
- Save.
Note
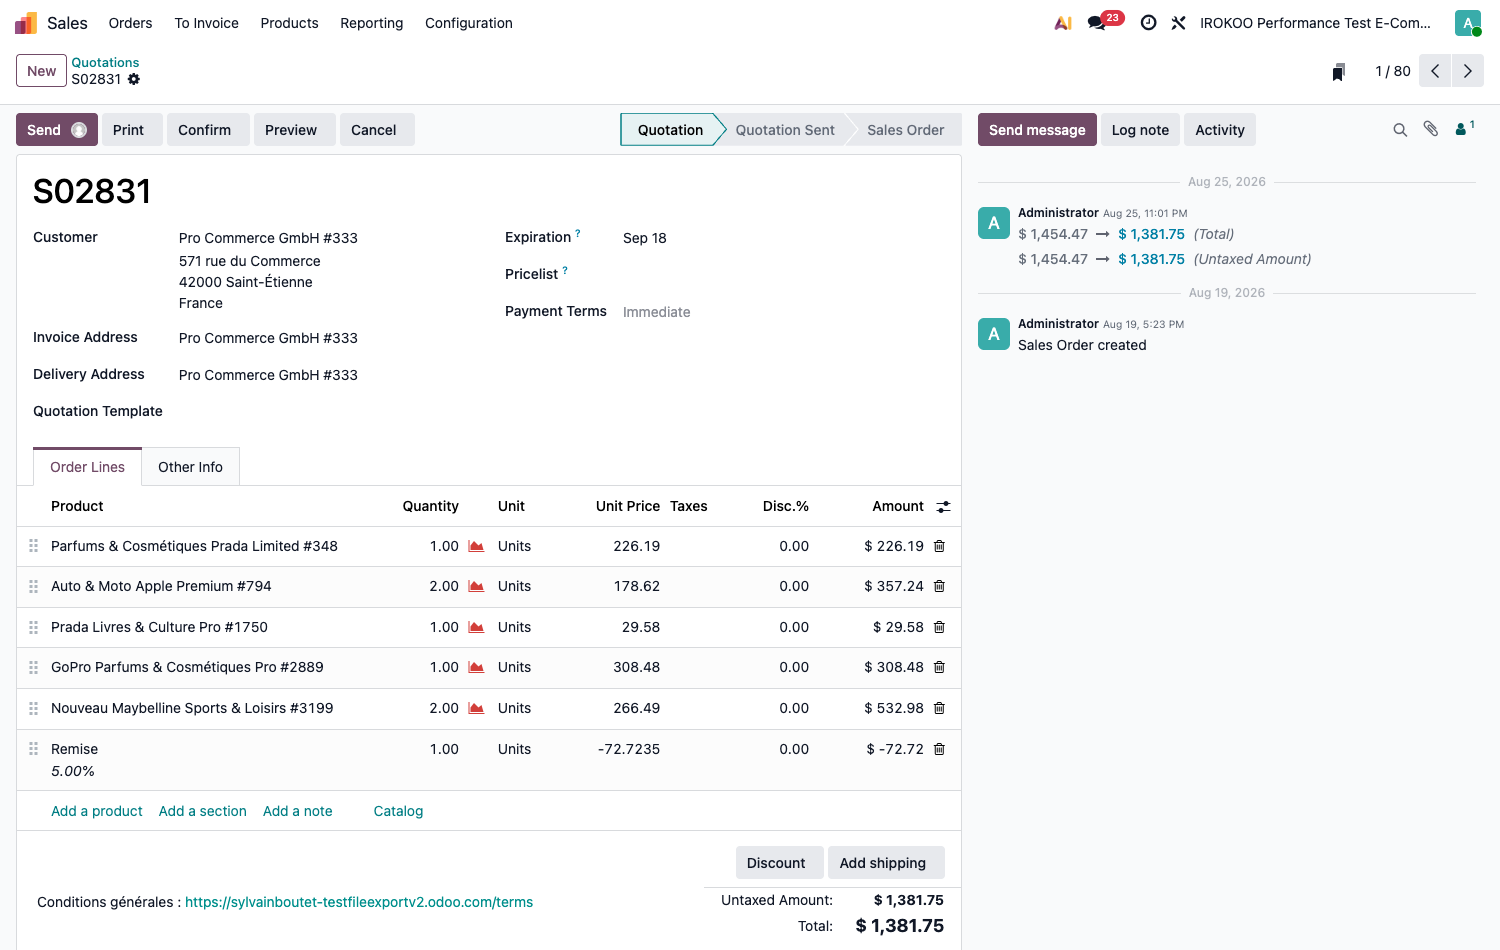
Three links below the lines complete the entry. Add a product inserts an ordinary line; Add a section introduces a heading that groups the lines that follow; Add a note inserts a free comment, carried over onto the document sent to the customer.
The Catalog link opens the catalogue as tiles, where you build the offer by clicking on items rather than looking them up line by line. It is the quickest route on a quotation with many references.
Astuce
The Add shipping button computes the shipping costs according to the delivery method chosen and adds them as a quotation line. It assumes the Delivery Methods option is enabled.
Astuce
Structure long quotations with section and note lines: clicking Add a section groups the lines under a heading, which makes the offer readable on the customer's side.
Using a quotation template
A template pre-fills a quotation with a set of items and conditions. It saves rebuilding recurring offers, and guarantees that the conditions announced are the same from one salesperson to the next.
- Enable Quotation Templates in Sales › Configuration › Settings.
- Open Sales › Configuration › Sales Orders › Quotation Templates and click New.
- Name the template, then fill in: - the Quotation Validity, in days, which will compute the expiration date; - the Confirmation Mail sent automatically when the order is confirmed; - the Invoicing Journal, if sales of this kind are to be posted separately; - the Online Signature and the Online Payment, which take precedence over the general setting.
- In the Lines tab, build the offer: Add a product for items, Add a section and Add a note to structure it.
- In the Terms & Conditions tab, enter the text specific to this kind of offer.
- Save.
On a new quotation, select the template: the lines, the conditions and the confirmation requirements apply. All that is left is to adjust quantities and prices to the case at hand.
Note
The template carries its own Online Signature and Online Payment settings. One kind of offer can therefore require a down payment while the others make do with a signature, without touching the general configuration.
Astuce
The quantities entered in the template are starting points, not commitments. Put the most common quantities in rather than values of one: the salesperson then corrects the exceptions instead of entering everything.
Pricing with the quote calculator
Some offers are not built line by line: they are computed. A measurement to be converted into quantities, a scale with breaks, a formula combining area, difficulty coefficient and travel. The quote calculator answers this need by attaching a spreadsheet to the template.
- On the quotation template, fill in the Quote calculator field with the spreadsheet to be used.
- Build the pricing in it as you would in a spreadsheet: input cells, formulas, results.
- Synchronise the result cells with the quotation fields, using the Sync with field command: the computed quantity will feed the corresponding order line.
On a quotation created from this template, a Quote calculator smart button opens a copy of the sheet, specific to that quotation. The salesperson enters the site data in it, and the computed quantities are carried over onto the lines.
What this changes
Pricing stops being done on the side (in a personal spreadsheet, on the corner of a table) and then re-entered in Odoo. It lives in the quotation, with it.
The consequences are concrete: the assumptions behind the calculation remain available afterwards, a revised offer is redone by changing one input, and the pricing method is the same for the whole team since it is carried by the template.
Note
Each quotation receives its own copy of the sheet. Modifying the template's calculator therefore has no effect on quotations already drawn up, which keep the pricing as it was done.
Point d'attention
The calculator belongs to the Enterprise edition. It also assumes that someone builds and maintains the spreadsheet: it is a business tool, to be entrusted to whoever masters the pricing method, not a setting to be switched on.
Offering options
An option is not a separate line: it is a section of the order flagged as optional. The lines it contains drop to zero and become editable by the customer in the online quotation.
- Open the quotation and add a section in the Order Lines tab, using Add a section.
- Place in it the extras and alternatives the customer can choose.
- On the section row, open the three-dot menu at the end of the row and choose Set Optional.
The quantities of the lines in the section then drop to zero, and the quotation total no longer counts them. When the customer views the quotation online, they adjust those quantities themselves with the + and − buttons; what they keep feeds the order.
Note
A quotation template can carry the section ready-made: Odoo creates it under the name Optional Products Section, already flagged optional. The section row menu offers Unset Optional to reverse this, which brings the quantities back to 1.
Enriching the quotation PDF
A quotation can be accompanied by commercial documents assembled automatically into the PDF: cover page, company presentation, datasheets for the products offered, terms and conditions.
- Enable PDF Quote builder in Sales › Configuration › Settings.
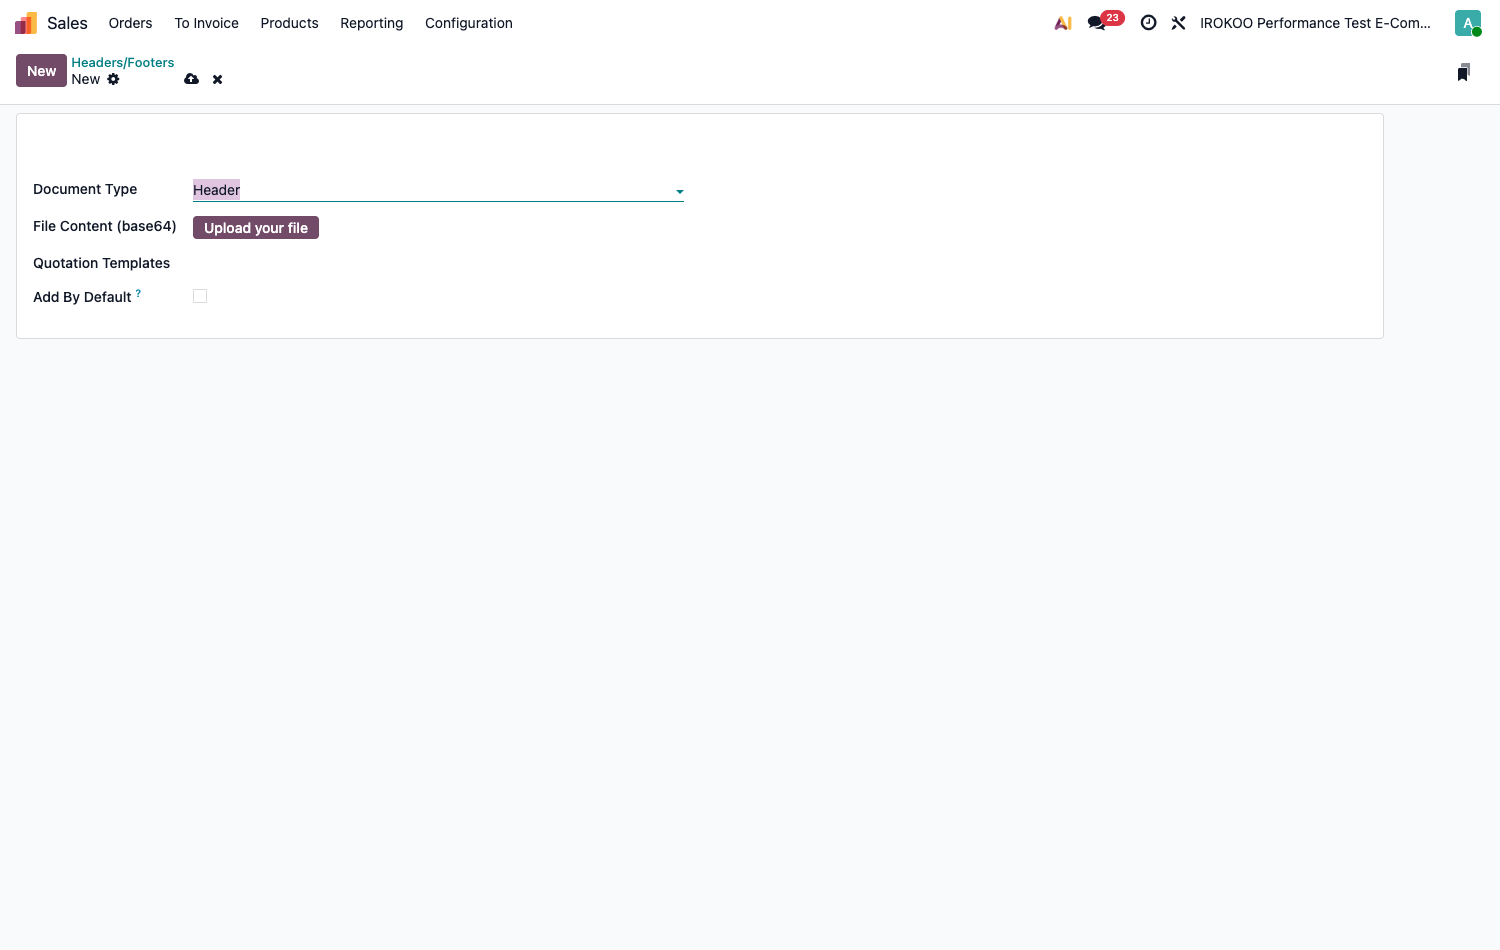
- Open Sales › Configuration › Sales Orders › Headers/Footers.
- Click New.
- Fill in the Document Type: Header to place the document before the proposal, Footer to place it after.
- Upload the PDF into the File Content (base64) field.
- Restrict the scope if needed through the Quotation Templates: the document will only be offered on quotations drawn up from those templates. Left empty, it is offered everywhere.
- Tick Add By Default so that it is attached from the outset to every new quotation, without having to select it.
- To attach a datasheet to a specific product, open the product record, click the Documents smart button, and upload the PDF there: it will only be added to the quotation if that product appears on it.
- On the quotation, open the dedicated tab to tick the documents to be included in the send.
Note
The Headers/Footers menu only exists once the option is enabled: ticking the box installs an additional module, which creates the menu. If it does not appear immediately, refresh the page.
The text areas of the PDFs uploaded can be fed with the quotation's data (customer name, amount, validity date, salesperson name) which personalises the document without editing the file on every send. The Form Fields Included field lists the areas detected in the file uploaded.
Astuce
Keep Add By Default for documents meant to accompany every offer: terms and conditions, company presentation. A product brochure is better left optional, or it will weigh down quotations it adds nothing to.
Sending the quotation
- Click Preview to check the quotation as the customer will see it in their browser.
- Click Send.
- Check the recipient and the attached documents, personalise the message if needed.
- Confirm the send.
The status of the quotation moves from Quotation to Quotation Sent, which distinguishes offers that have been sent from those still being prepared. The Print button generates the PDF without going through email.
Setting the terms and conditions
Terms and conditions are printed at the foot of quotations, orders and invoices. They are defined once for the whole company, in the accounting settings.
- Open Accounting › Configuration › Settings.
- Enable Default Terms & Conditions.
- Choose the Terms & Conditions format: - Add a Note: the text is entered in the field that appears below and is printed in full at the foot of the documents; - Add a link to a Web Page: the documents carry a link to a page on your website, which the Update Terms button lets you write.
- Save.
Note
The choice depends on the length of the text and on how it is used. Short terms are better shown on the document itself, which the customer keeps as it is. Long terms weigh the PDF down and lend themselves better to the link, which has the further advantage of being updatable without reissuing documents.
Point d'attention
The link points to the online version of the moment, not to the one in force at the time of signing. If your terms change, keep a record of the successive versions: it is the one accepted by the customer that binds them.
Astuce
A quotation template can carry its own terms and conditions, in its dedicated tab (see section 11.3.2). They then replace the company text for offers drawn up from that template, useful when an activity falls under particular conditions.
Turning the quotation into an order
Confirmation by the salesperson
- Open the accepted quotation.
- Click Confirm.
The document moves to the Sales Order status and the delivery order is created automatically in Inventory.
Note
The order reference does not change: it is assigned when the quotation is created and follows it all the way to the invoice.
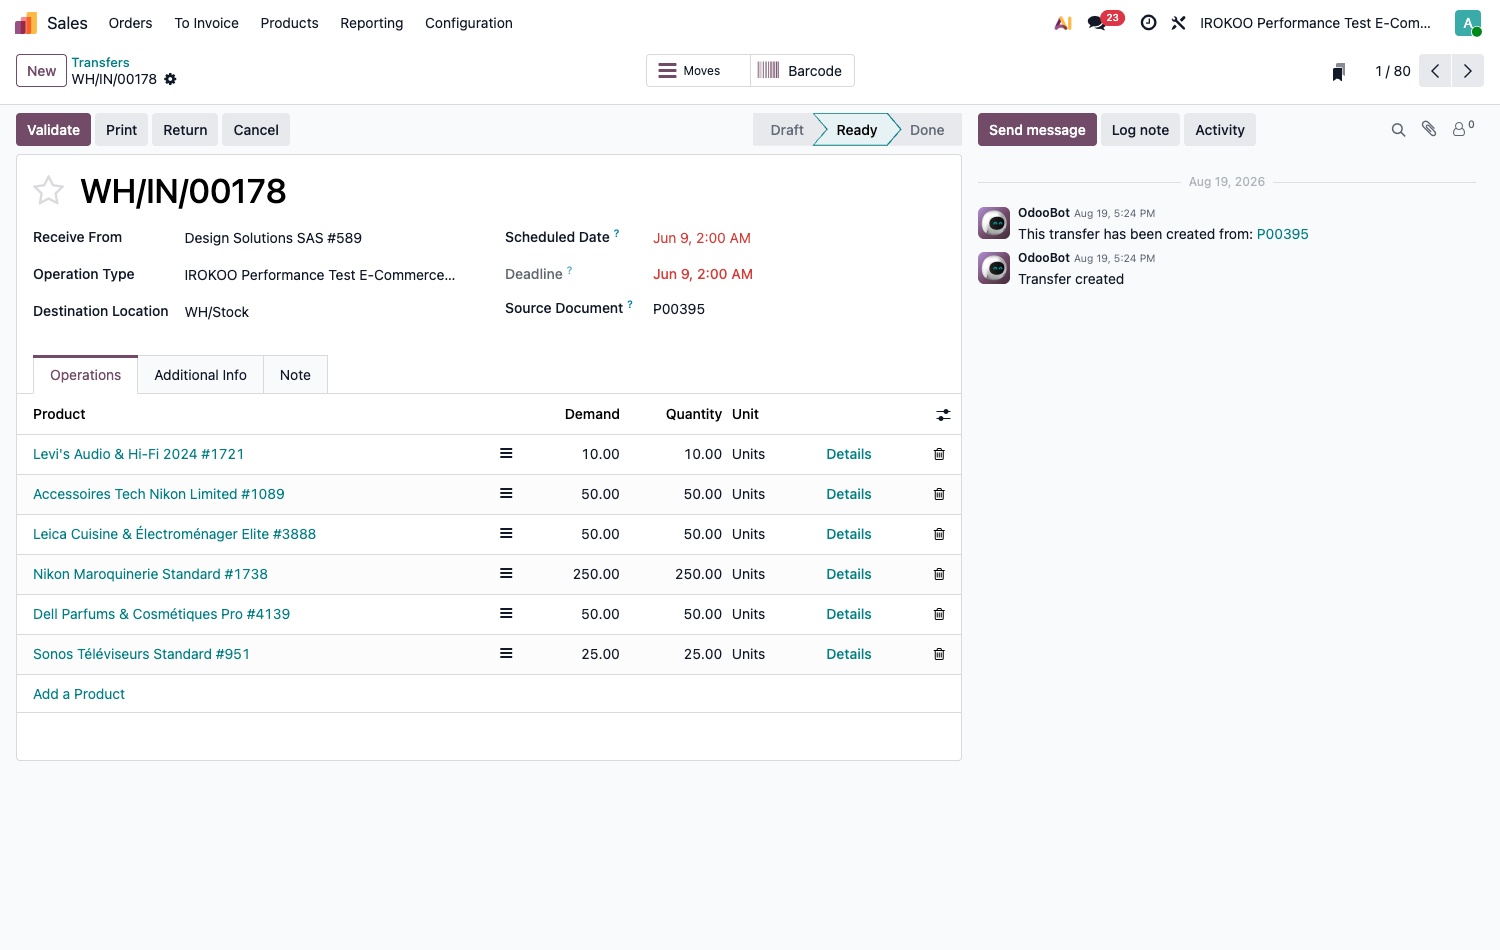
The documents it generates, on the other hand, carry their own reference: a delivery order is
called WH/OUT/01026, for example. The link between the two is read in the
Source Document field of the transfer, and in the smart button on the order.
The delivery order is created in the Waiting or Ready status depending on whether the goods are available or not. It carries the Delivery Address from the order, a Scheduled Date computed from the lead times, and for each line the Demand quantity next to the Quantity actually picked.
Note
A Not Available mention on a line means the quantity could not be reserved. The Check Availability button re-runs the reservation: it is used after a receipt, to attach to the delivery order the goods that have just come in.
Point d'attention
Confirming an order for which stock is insufficient blocks nothing: the delivery is created and stays pending. It is the replenishment screen that will surface the need (see section 10.5.1). So do not look for a warning message on confirmation, there is none.
Confirmation by the customer
The customer can accept the quotation themselves, from the link received by email, without the salesperson stepping in. Two requirements can be set for them, separately or together.
Set the default behaviour in Sales › Configuration › Settings:
- Online Signature: the customer draws their signature in the browser;
- Online Payment: the customer pays all or part of the amount;
- Prepayment percentage: the share to be paid for the order to be confirmed. At one hundred, the quotation is paid in full; at thirty, a 30% down payment is enough.
These settings set the value carried over onto new quotations. Each quotation then carries them in its Other Info tab, where they can be changed case by case: a small order can be confirmed on a signature alone, a large order can require a down payment.
What the customer sees. The quotation opens in their browser, with the detail of the lines and the attached documents. Depending on the requirements set, the acceptance button reads Accept & Sign, Accept & Pay or Sign & Pay.
What happens next. The quotation moves to the Sales Order status, the salesperson is notified in the chatter, and the document keeps a record of the agreement: the image of the Signature, the name of the signatory in Signed By and the timestamp in Signed On. When a payment is required, the transaction is attached to the order and the down payment gives rise to an invoice.
Why this is useful beyond convenience
Online acceptance shortens the decision time, there is no longer an order form to print, sign, scan and send back.
Above all it provides evidence: the signature is timestamped and attached to the document, the payment materialises the commitment. In case of a later dispute over the content of the order, it is the accepted quotation that prevails, with its lines and its terms and conditions as they stood at the moment of the agreement.
Point d'attention
An expired quotation can no longer be accepted online: past the Expiration date, the customer can neither sign nor pay. You then have to reopen the quotation and push the date back before sending them the link again.
Astuce
Online payment requires at least one payment provider to be configured, and the down payment requires a dedicated account. Settle these two points before announcing the feature to the salespeople: a customer who runs into a payment that does not work is a customer who calls back.
Modifying a confirmed order
- Open the order.
- Modify the lines concerned, or add some.
- Save.
Odoo passes the change on to logistics, without your having to touch the delivery order.
What becomes of the delivery order
- The existing transfer is completed if the goods have not yet left. An increased quantity, an added line: the movement joins the delivery order in progress, which remains a single one.
- A second transfer is created if the first can no longer take it, because it has already been validated, cancelled, or because the picking list has been printed. Both transfers then point to the same order.
- A reduced quantity decreases the corresponding movement, as long as it has not been validated. If the goods have already left, the order stays above what has been delivered and the difference is settled by a return.
Point d'attention
Printing the picking list closes the transfer to additions. This is deliberate: the warehouse worker works from a paper document, and a line that appeared after printing would never be picked. A change made after printing therefore always produces a second transfer, which has to be remembered and handled.
Note
Lines already delivered or invoiced can no longer be edited freely: Odoo prevents the ordered quantity being brought below what has gone out or been invoiced. You then have to go through a goods return or a credit note.
Astuce
Before any correction, look at the smart buttons at the top of the order: they show how many transfers and invoices are attached to it. Two transfers instead of one signal a change that has already been passed on, and save you creating a duplicate by trying to correct twice.
Delivering
Validating the delivery
- Open the sales order.
- Click the Delivery smart button.
- Check the products and the quantities.
- Click Validate.
In a multi-step warehouse, validate the picking first, then move on to the shipping step using the Next Transfer button.
Delivering partially
Enter the quantities actually shipped and validate, then accept the creation of the backorder. The delivery status of the order stays partial until the balance is shipped.
Pricing and discounting
Pricelists
The pricelist assigned to the customer applies automatically to every new line. Building the lists is described in chapitre 9.
Discounts
Three levels coexist:
- Line discount: entered directly in the Disc.% column of a line.
- Global discount: applied to the total of the quotation.
- Automatic discount: coming from a pricelist rule, triggered by quantity, amount or product category.
Point d'attention
If the price displayed is not what you expect, check in this order: the customer's pricelist, the active rules of that list, today's date against the validity periods, then the document currency.
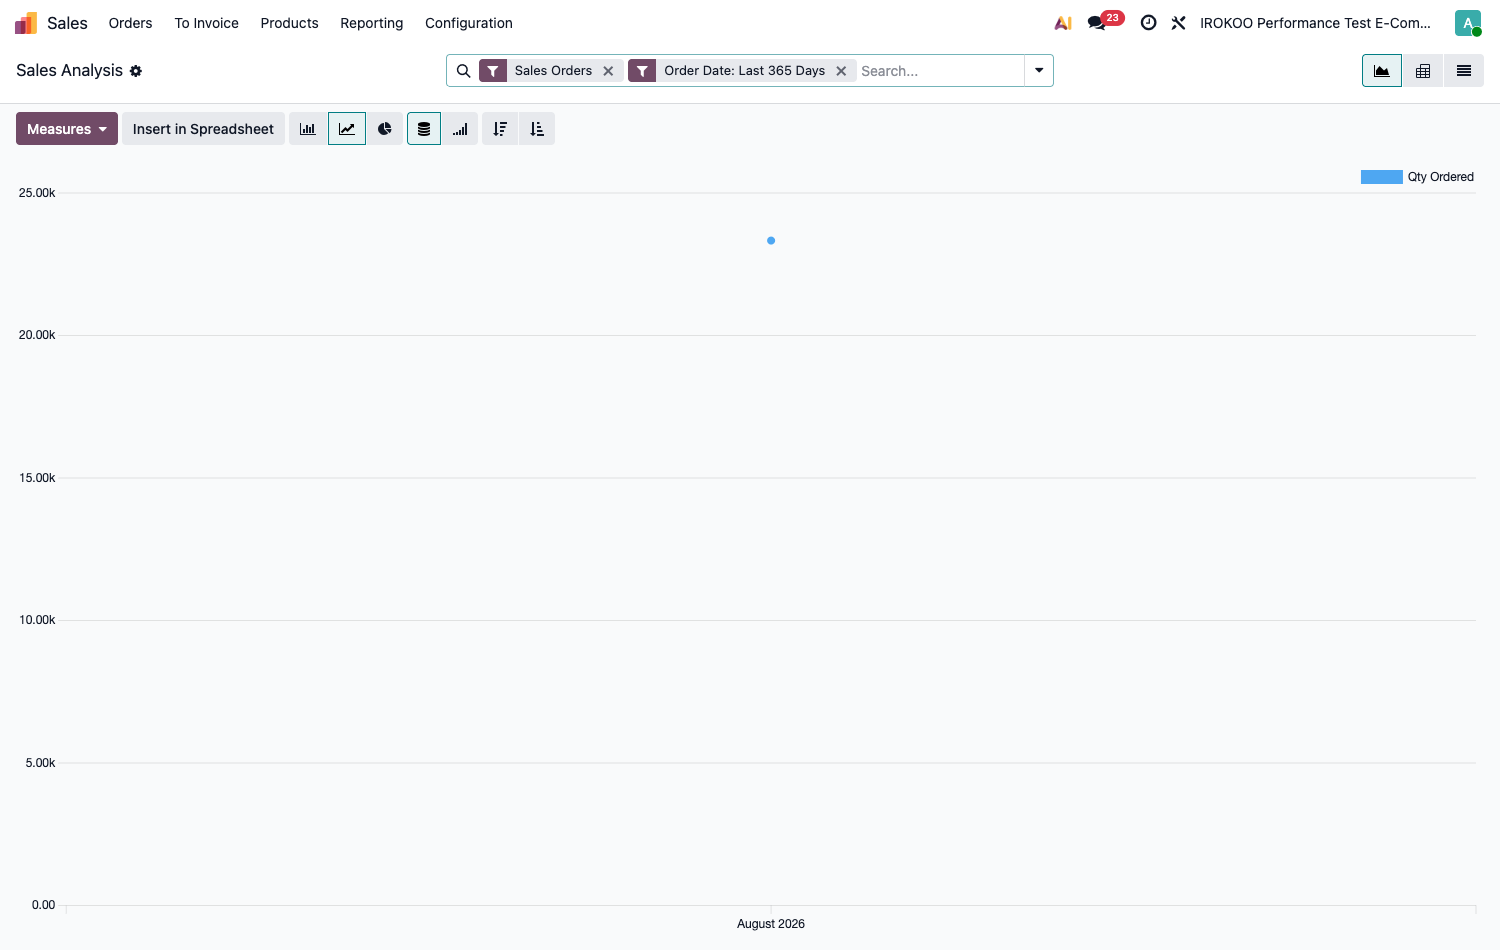
Analysing sales
- Open Sales › Reporting › Sales.
- Choose the Measures to display: revenue, quantities, margin.
- Cross by customer, product, salesperson, team or period with Group By.
- Save recurring analyses in Favorites to come back to them in one click.
Granting a discount
Discounts require the Discounts option to be enabled in the Pricing block of Sales › Configuration › Settings. Without it, neither the discount column nor the button described below appears.
Discounting one line
Enter a rate in the Disc.% column of the line concerned. This is the route to take when the discount only covers certain items.
Discounting the whole quotation
The Discount button, below the lines, opens a window where you enter a rate in the Discount field, then choose one of three options before clicking Apply.
| Option | What it does to the document |
|---|---|
| On All Order Lines | Writes the rate into the Disc.% column of every line. No line is added: the quotation shows the discounted price item by item. |
| Global Discount | Adds discount lines at the end of the quotation carrying the rate in their label: for example Discount 5%. The item lines are not modified. |
| Fixed Amount | Does the same with a set amount instead of a percentage. The label of the line created is simply Discount. |
Point d'attention
On All Order Lines overwrites the discounts already entered line by line, across the whole quotation, without asking for confirmation. A discount granted on a single item therefore disappears in favour of the overall rate.
Note
Global Discount and Fixed Amount do not necessarily create a single line. When the quotation contains items subject to different taxes, Odoo produces one discount line per tax regime, so that the discount is allocated correctly: each one then stating the taxes it relates to.
Note
The first use creates a Discount service product, used to carry the lines generated. A user who does not have the right to create products cannot trigger that creation: Odoo then invites them to go through line-by-line discounting, or to have an administrator step in once.
Astuce
The choice is not commercially neutral. On All Order Lines dissolves the discount into the prices: the customer sees a price, not a gesture. Global Discount shows it explicitly at the end of the quotation, which highlights it , and makes it harder to carry over tacitly, since it reads as a one-off concession.
Example of a full cycle
From quotation to delivery
A customer asks for an offer for 10 units of product A and 5 units of product B.
- Draw up the quotation. From Sales › Orders › Quotations, create the quotation, choose the customer, add the two lines. Prices come from their pricelist, taxes from their fiscal position.
- Grant the discount. Click Discount below the lines, enter
5in the Discount field, choose the Global Discount option, then Apply. ADiscount 5%line is added at the end of the quotation; the item lines stay at full price. - Attach the documentation. On product A's record, a datasheet was uploaded through the Documents smart button: it is added to the PDF since that product appears on the quotation.
- Send. Check through Preview, then Send. The quotation moves to the Quotation Sent status.
- The customer accepts. From the link received, they click Accept & Sign and draw their signature. The order is confirmed without the salesperson stepping in, and the document keeps the signature, the signatory's name and the timestamp.
- The delivery is created. A delivery order appears in Inventory, carrying its own reference and pointing to the order through its Source Document. It is Ready if stock is available, Waiting otherwise.
- The warehouse ships. The picked quantities are entered, then the transfer is validated with Validate. Stock is decreased.
- Invoice. From the order, create the invoice: it takes the ordered or delivered quantities depending on the product's invoicing policy (see section 11.2.1), discount included. What follows is covered in chapitre 12.
Good practice
Selling effectively with Odoo
- Create templates for recurring offers rather than duplicating old quotations.
- Always fill in an expiration date: it creates the deadline for a decision.
- Use optional products to increase the basket without weighing down the main offer.
- Check availability before confirming an order with a fixed date.
- Record exchanges in the chatter of the document, not in personal emails: the salesperson's successor must be able to pick the file up.