Invoicing
À l'issue de ce chapitre
- invoice an order in full, as a down payment, or on delivered quantities;
- send the invoice to the customer and record the payment;
- correct an invoice with a credit note and handle a refund;
- monitor receivables, chase overdue accounts and read the invoicing reports.
The Invoicing application handles customer and vendor invoices, payment tracking and the basic accounting data. This chapter covers the operational cycle; bookkeeping proper is covered in chapitre 14.
Invoicing or Accounting?
Two applications carry the accounts, and the question comes up constantly: which one do you need? The answer depends less on those two names than on the edition you are running.
Invoicing is the foundation. It covers issuing and tracking invoices, the chart of accounts, the journals, the taxes, the journal entries and analytic accounting.
Accounting is an Enterprise edition application that sits on top of it.
What is really going on
In Community, only the foundation exists. The database holds the invoices and the journal entries, but neither assisted bank reconciliation, nor the financial statements, nor automatic follow-ups are available: the books are kept elsewhere, at the accountant's office.
In Enterprise, installing Invoicing is enough to get most of the accountant's toolkit. It comes along on its own: the reconciliation screen, the financial statements, customer follow-ups, fiscal years and lock dates.
The Accounting application then adds three things: fixed asset management, the tracking of assets and liabilities, and the intermediate In Payment status described further on. It also renames the application, which is why the menu paths sometimes start with Invoicing and sometimes with Accounting.
| Community (the foundation alone | Enterprise) as soon as Invoicing is installed |
|---|---|
| - invoices, credit notes and payments, customers and vendors; - chart of accounts, journals, taxes, fiscal positions, currencies; - journal entries and analytic entries; - payment terms; - invoice analysis; - audit trail and securing of journal entries. | - everything above; - bank reconciliation screen and reconciliation models; - financial statements: balance sheet, profit and loss, general ledger, trial balances; - tax returns and their filing; - fiscal years and lock dates; - multi-level customer follow-ups; - digitisation of incoming bills. |
Note
The Accounting application is therefore not the price of entry to accounting: on an Enterprise database, almost everything is already there with Invoicing. What it brings is fixed assets, loans, and the tracking of assets and liabilities.
Point d'attention
This chapter and chapitre 14 are written for a database that has the Accounting application, whose menu paths start with that name. On an Enterprise database where only Invoicing is installed, read Invoicing at the first level: the rest of the path is the same, and the screens are identical.
On a Community database, the functions in the right-hand column do not exist: the passages that refer to them do not apply.
Setting up invoicing
Basic settings
Accounting › Configuration › Settings groups the options into thematic blocks. The list is shorter in the Community edition: the blocks specific to bookkeeping (default accounts, fiscal periods, analytic accounting, reports) assume the Enterprise edition modules.
Fiscal Localization: check that the package matches the country you operate in. It is what installed the chart of accounts, the taxes and the fiscal positions (see section 5.5).
Taxes: the block with the greatest structural effect.
| Setting | What it governs |
|---|---|
| Default Taxes | The sales and purchase taxes carried automatically onto new products. They do not change existing product records. |
| Rounding Method | Round per Tax computes the VAT on the total for each rate; Round per Line rounds it line by line. The difference is a matter of pennies, but it must be consistent with what your accountant expects. |
| Cash Basis | Allows VAT to become chargeable on receipt of payment rather than on invoicing. A setting to settle with your accountant, according to the nature of the business. |
| Fiscal Country | The country your accounts fall under, which determines the returns available. |
Currencies: the company's Main Currency, and Automatic Currency Rates, which keeps the rates up to date from an official source at the chosen interval.
Customer Invoices: the presentation and the wording.
| Setting | What it adds |
|---|---|
| Default Terms & Conditions | The terms printed at the foot of the documents, as a note or as a link (see section 11.3.7). |
| Customer Addresses | Allows separate invoice and delivery addresses on the documents. |
| Credit Limit | Warns during entry when a customer's outstanding balance exceeds the ceiling set for them. |
| Total amount of invoice in letters | Adds the amount written out in words, required in some countries. |
| Taxes in company currency | Also shows the taxes in local currency on invoices issued in a foreign currency. |
| Default Incoterm | The incoterm carried onto export documents. |
Customer Payments: Invoice Online Payment opens payment from the portal; SEPA Direct Debit (SDD) allows you to collect from customers who have signed a mandate; QR Codes adds a payment QR code to the invoices; Batch Payments groups several payments into one operation to simplify reconciliation.
Vendor Bills: automatic posting of the bills of a vendor whose extractions prove reliable several times in a row, and prediction of the product from the line label. Vendor Payments, a separate block: check printing and SEPA Credit Transfer / ISO20022 to pay by bank file.
Digitization: Document Digitization extracts the data from bills received as PDF or scans by optical reading. The processing applies separately to vendor bills and to customer invoices, each with a choice between no digitisation, digitisation on demand, or automatic digitisation.
Note
Digitization consumes credits, deducted for every document processed. The automatic mode processes everything that comes in: keep it for steady volumes, and choose on demand for occasional use.
Accounting Firms mode: intended for accounting practices, it makes the document sequence editable and adds fast entry from the tax-inclusive total. There is no reason to enable it on a company database.
Astuce
At start-up, enable only the Fiscal Localization, Taxes and Currencies blocks, plus the terms and conditions. The rest can be added as the need arises, and every option left aside is one screen fewer to explain to users.
Journals
Journals are the entry points for accounting records: sales, purchases, bank, cash, miscellaneous operations.
- Open Accounting › Configuration › Accounting › Journals.
- Check the journals created by the localisation.
- Open the bank journal and fill in the account details.
- Adjust the numbering sequences if your organisation requires it.
Note
Creating several sales journals lets you separate activities (trading and services, or two brands) with distinct numbering sequences, without multiplying companies.
The taxes
The fiscal localisation installs the country's taxes: for France, the VAT rates of 20%, 10%, 5.5% and 2.1%, on sales as well as purchases. So there is normally nothing to create.
Note
The rates quoted here are French. On another localisation the mechanism is identical, only the rates and the names of the taxes differ.
- Open Accounting › Configuration › Accounting › Taxes to consult them.
- For every tax in use, check: - the Tax Type: Sales or Purchases; - the Tax Computation: Percentage in most cases, Fixed for a flat amount, Group of Taxes to combine several taxes; - the Amount, that is, the rate; - the Tax Scope, which restricts its use to Goods or to Services; - the Included in Price option, if the catalogue prices are tax inclusive.
Note
The tax carried by a product is the one that applies by default. The Default Taxes in the settings only apply to products created afterwards: they do not change the existing catalogue.
Point d'attention
Do not change the rate of an existing tax when the law changes: the documents already issued refer to it and would be recomputed. Create a new tax, and archive the old one so that it is no longer offered.
Fiscal positions
The same sale is not taxed the same way depending on the customer: 20% for a French customer, exemption for a VAT-registered European customer, exemption again for an export outside the Union. The fiscal position is the mechanism that automates that adaptation.
What it does
A fiscal position is a mapping table. It says: wherever the product carries this tax, apply that one instead: and, if need be, wherever the line would go to this account, post it to that one.
The product therefore keeps a single tax, the one for the standard regime. It is the customer's fiscal position that substitutes it at the moment of entry, without the salesperson having to give it a thought.
The French localisation installs the usual positions: intra-Community regime, export outside the Union, French overseas territories, reverse charge. They can be consulted in Accounting › Configuration › Accounting › Fiscal Positions.
Reading a fiscal position. The Taxes smart button opens the list of the taxes attached to
it. It reads line by line: the Name column carries the tax to apply, the Replaces column
the ones it stands in for. A line reading 0% EX G set against 20% G,
10% G and 5.5% G therefore means: whatever the standard rate of the goods,
apply the exemption.
The Tax Scope column distinguishes Goods from Services, which do not always fall under the same regime.
Assigning the position. Two ways:
- by hand, in the Fiscal Information block of the customer record (see section 11.1.4);
- automatically, by ticking Detect Automatically on the position and filling in the Country or the Country Group it applies to. Odoo then picks it from the customer's address. The VAT required option further makes it conditional on a VAT number being present on the record, which is what tells a VAT-registered business from a private individual.
Point d'attention
The intra-Community exemption assumes a valid VAT number. Without it, the sale falls under the domestic rate, and the VAT is yours to pay. The VAT required option sets that condition in Odoo; the validity check on the number itself is configured separately in the settings.
Note
A fiscal position can also carry legal statements, printed on the documents that use it: the reverse charge statement, or the reference to the article of the tax code on which the exemption rests. They are entered in its notes field.
Astuce
Check the behaviour on a test quotation before going live: create a dummy customer in each regime (domestic, VAT-registered European, outside the Union) and check the tax that is proposed. A badly set position only shows up on the VAT return, several weeks later.
Invoice numbering
The numbering of accounting documents obeys legal rules: the numbers must run without gaps, without duplicates, and in chronological order. Odoo uses a particular mechanism for this, which is worth understanding before you try to configure it.
How Odoo numbers
The number is not drawn from a counter defined in advance. Odoo reads the number of the last posted invoice in the same journal, works out the format used, and increments it.
A document numbered INV/2026/00042 therefore produces INV/2026/00043, and
the counter starts again at 00001 when the year changes because the year is part of
the format. Nothing is configured: the format is deduced from what came before.
Choosing the format therefore comes down to writing the first number by hand:
- Create the first invoice of the journal and leave it in draft.
- Correct its number in the field provided: for example
INV/2026/00001. - Post it. All the following ones will take up that format.
This is the move to make before the first real invoice. Once the series has started, the format can only be changed by renumbering the documents already issued.
Correcting a series already started is possible as long as the mistake is recent, through a dedicated action.
- Open the invoice list and tick the ones to renumber, they must belong to the same journal and be of the same kind.
- Click Actions then Resequence.
- Enter the First New Sequence: it is that number which sets the format of the whole series.
- Choose the order: Keep current order, or Reorder by accounting date to restore the chronology.
- Check Preview Modifications, which shows the old and the new number of each document, then Confirm.
Point d'attention
The Resequence action only appears in developer mode. This is not an oversight: renumbering posted documents is a sensitive operation, to be kept for correcting a configuration mistake spotted early. It is refused on a journal secured by hashing when a reordering by date is asked for.
Astuce
Take the time to set the format on a test invoice, at the start of the project, rather than relying on this action. It gets you out of trouble, but renumbering invoices already sent to customers or to the accountant creates more confusion than it resolves.
Note
Whether the year or the month appears in the number governs the reset. A format
INV/2026/00001 starts again at one every year; INV/2026/01/00001 every
month; INV00001 never starts again. Odoo announces what it has deduced with a
The sequence format has changed message when you edit a number by hand.
Point d'attention
The number is assigned on posting, not on creation. A draft carries the Draft label, or its prospective number as a watermark, and consumes no number: it can be deleted without leaving a gap. Once posted, on the other hand, an invoice can no longer be deleted, it is cancelled by a credit note.
That is what guarantees the absence of gaps, and it is also why Odoo refuses to change the journal of a document that has already been numbered.
Note
Credit notes carry their own series, separate from that of the invoices: for example
RINV/2026/00001 alongside INV/2026/00003. This is the default behaviour of
sales and purchase journals, governed by the journal's Dedicated Credit Note Sequence
option. Unticking it numbers credit notes and invoices in a single continuous series.
Astuce
One sales journal per activity gives separate series (trading and services, or two brands) without multiplying companies. Set these series before the first invoice: taking them back afterwards means renumbering posted documents, which is not possible.
Note
The journal's Secure Posted Entries with Hash option adds a digital fingerprint to every posted entry, chained to the previous one. Any later alteration becomes detectable. It is required by the regulations of several countries, France among them, and can no longer be disabled once active.
Payment terms
- Open Accounting › Configuration › Invoicing › Payment Terms.
- Create the terms matching your practice: immediate, 30 days, 30 days end of month, 45 days end of month, instalments in several payments.
- Assign the default term to each customer on their contact record.
Point d'attention
Payment terms compute the due date, which governs the aged balance and the follow-ups. A badly configured term throws off the whole tracking of receivables.
Electronic invoicing
Sending invoices in electronic format relies on the Peppol network.
- Open Accounting › Configuration › Settings.
- In the section devoted to electronic invoicing, activate the service.
- Fill in the company identifier and follow the registration procedure on the network.
- Check, on the customer records, that the recipient's electronic identifier is filled in.
Note
The obligation to invoice electronically is rolled out in stages according to company size. Check the timetable that applies to your organisation and register early: it is not instantaneous.
Invoicing a customer
Invoicing from an order
- Open the delivered sales order.
- Click Create Invoice.
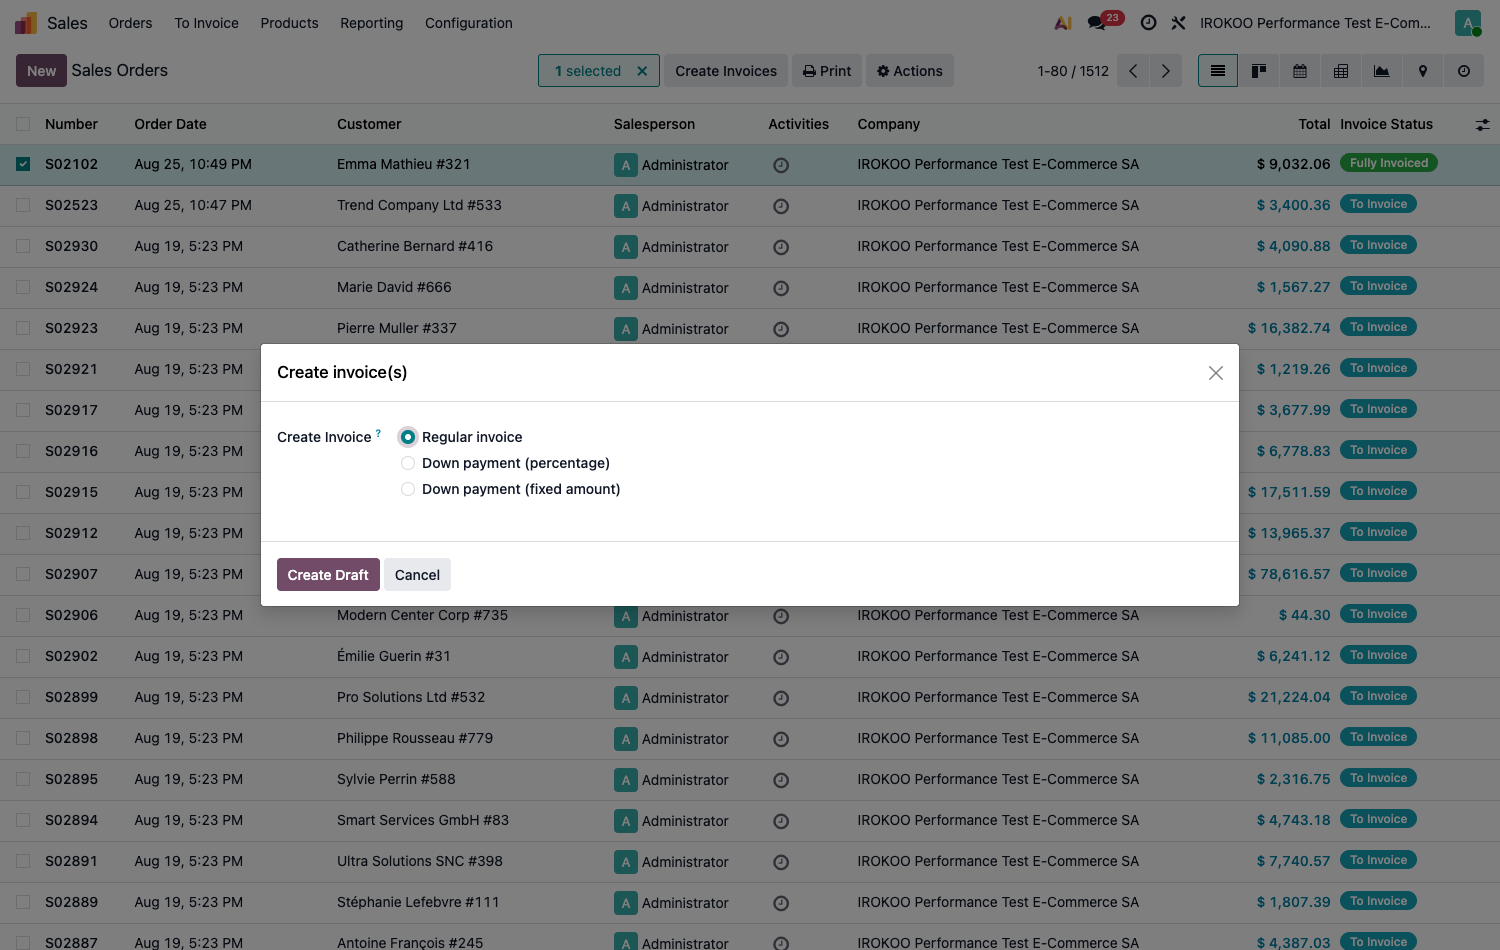
- Choose the mode: - Regular invoice: invoices the balance still due; - Down payment (percentage): invoices a share of the total; - Down payment (fixed amount): invoices a set sum.
- Click Create Draft.
- Check the lines, the date and the due date.
- Click Confirm.
Note
What the invoice takes up (ordered quantities or delivered quantities) depends on the invoicing policy set on each product. On a partly delivered order, that setting changes the amount invoiced.
Creating an invoice manually
- Open Accounting › Customers › Invoices.
- Click New.
- Select the customer, the invoice date and the payment terms.
- Add the product or service lines.
- Check the taxes and the income accounts.
- Click Confirm.
Point d'attention
A confirmed invoice receives its final number and can no longer be edited. To correct a mistake you have to reset it to draft, which remains possible even on a paid invoice, but not at all once the document carries a digital fingerprint (journal secured by hashing) or has been sent over the electronic invoicing network , or issue a credit note.
Invoicing several orders together
- Open Sales › To Invoice › Orders to Invoice.
- Select the orders belonging to the same customer.
- Click the Create Invoices button that appears at the top of the list.
- Choose the grouping you want, then validate.
Astuce
Grouped invoicing lightens the administrative load on customers who order frequently, and reduces by as much the number of payments to reconcile.
Sending the invoice
- Open the confirmed invoice.
- Click Send.
- Choose how it is to be sent: email, PDF download, or transmission over the electronic invoicing network where it is configured.
- Check the recipient and the message, then validate.
Note
On a brand-new database, the very first send does not open the window you expect but Configure your document layout. Odoo insists that you set the appearance of the documents before dispatching one: logo, colours, layout (see section 5.2). Once the layout is saved, the question does not come up again. The case only concerns administrators: an ordinary user goes straight to the sending window.
The send is logged in the invoice's message thread, which provides proof of transmission should it be disputed.
Collecting payment
Recording a payment
- Open the invoice.
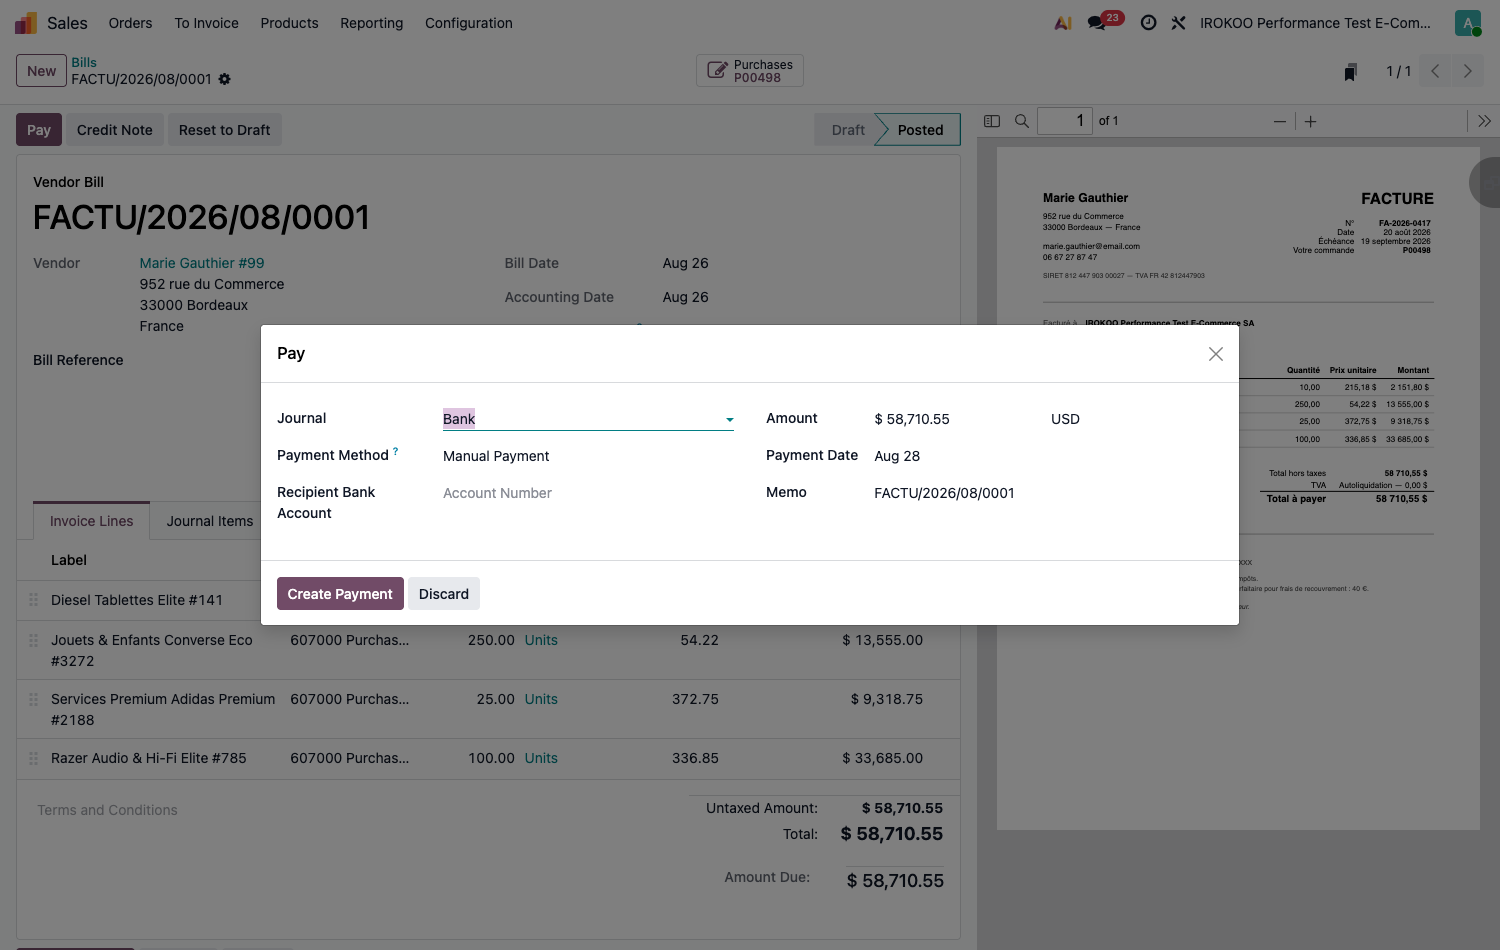
- Click Pay.
- Fill in the amount (the balance due is offered by default), the date, the Journal and the payment method.
- Add a reference that will let you identify the payment on the bank statement.
- Validate.
The invoice moves to the In Payment status, then to Paid once the payment has been reconciled.
Note
This intermediate state only exists if the Accounting application is installed. With Invoicing alone, the invoice goes straight to Paid as soon as the payment is entered, and the distinction described below does not arise.
Reconciliation, in two words
Recording a payment in Odoo means declaring that a payment has taken place. Nothing yet proves that it arrived: the declaration comes from you, not from the bank.
Reconciliation is the operation that matches that declaration with the corresponding line on the bank statement. It sets what you entered against what the bank actually recorded, and it is what moves the invoice to Paid.
The procedure is described in section 14.3. What matters at this stage is that it is indispensable: without it, an invoice stays In Payment indefinitely, and the balance of the bank account in Odoo corresponds to nothing verifiable.
Note
The distinction between In Payment and Paid is therefore not a presentation detail: the first status means the payment has been entered, the second that it has been confirmed by the bank. Only the second attests that the money has come in.
Partial payments
Enter the amount actually received and validate. The invoice moves to partially paid and shows the balance remaining. As many partial payments as necessary can be recorded.
Handling a down payment
The cycle of an order with a down payment runs as follows:
- Invoice the down payment from the order, as a percentage or a fixed amount.
- Send the down payment invoice and record its payment.
- Deliver.
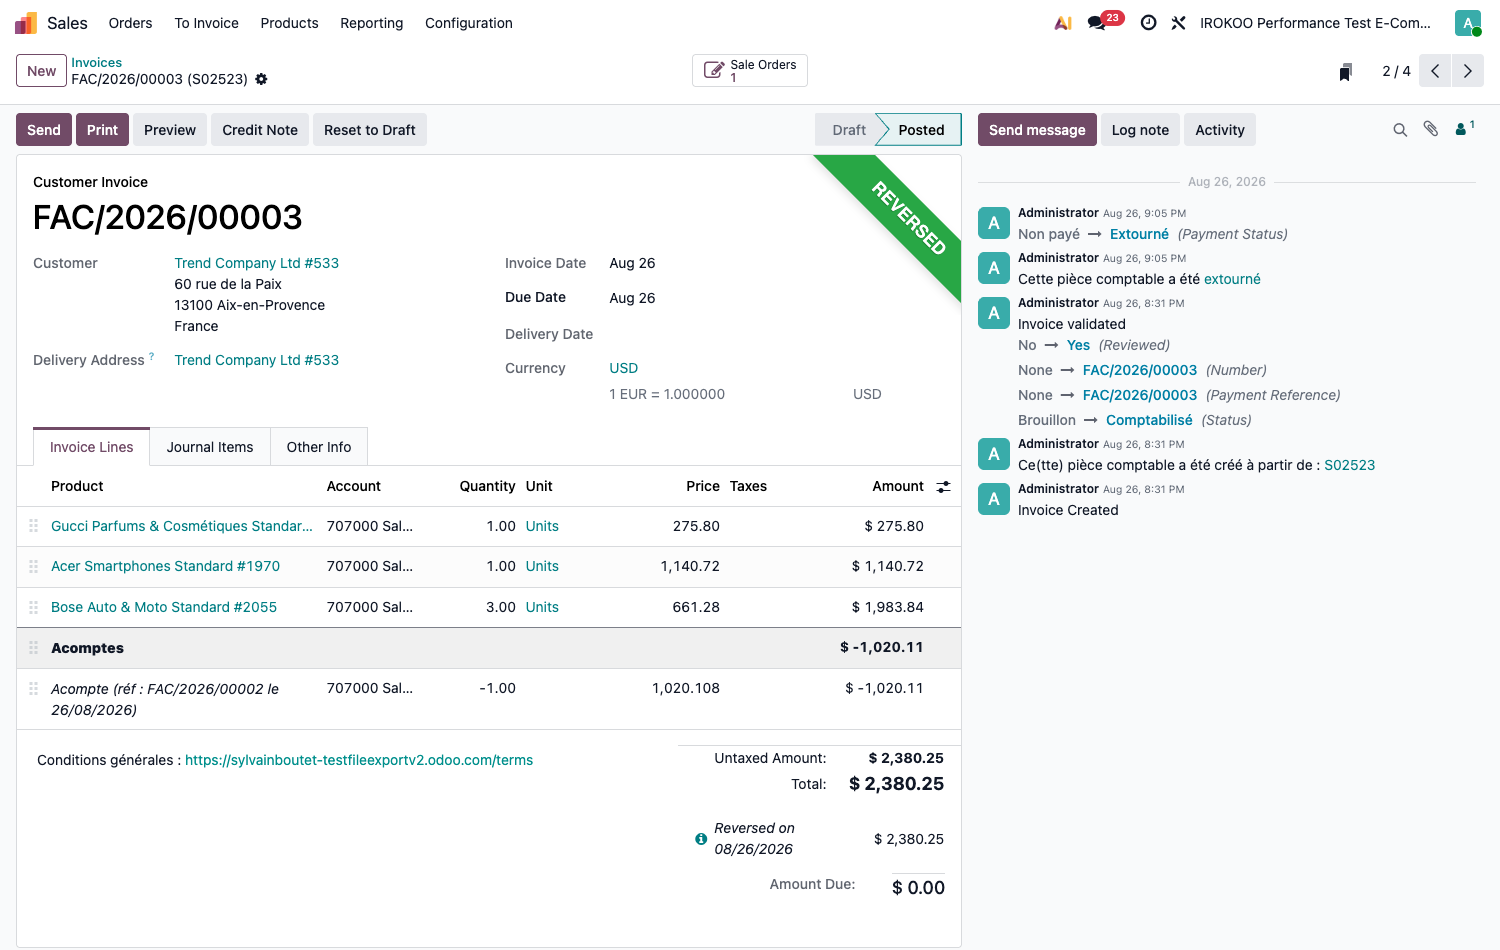
- Invoice the balance: Odoo automatically deducts the down payment already invoiced on the final invoice.
- Record the payment of the balance.
Point d'attention
Down payments pass through a dedicated partner account: advances and down payments received. The matching between the down payment invoice, its payment and the final invoice is done on the reconciliation screen. The advances account is cleared as soon as the final invoice is posted, the two entries cancelling each other out; what remains to be done is matching the items against one another.
Entering vendor bills
From a purchase order
The procedure is described in chapitre 10: the line-by-line check is done at the moment the bill is created, from the purchase order.
From a document received
This is the quickest route, and the one that limits keying errors: the vendor's document is loaded into Odoo, which extracts the data from it by optical reading.
Getting the document in. Three ways:
- drop it from Accounting › Vendors › Bills with the upload button, several files at a time;
- email it to a dedicated address attached to the purchase journal (see below);
- photograph it from the mobile application.
Odoo creates a draft bill for each document, with the file attached.
Extraction. Depending on the mode chosen in the settings, it is launched automatically or on demand with the Digitize document button. Odoo then fills in the vendor, the dates, the amounts and the taxes, and highlights the extracted values on the form.
- Check every recognised value, in particular the vendor, the total and the VAT.
- Correct what needs correcting: the corrections feed the learning and improve later extractions for that same vendor.
- Check or complete the expense accounts on the lines.
- Click Confirm.
Point d'attention
Digitization does not do away with checking. It offers a reading, often right, never guaranteed: a misread amount goes into the accounts exactly as if it had been keyed in. Checking the total and the VAT rate remains the accountant's business.
Note
Each document processed consumes a credit. The Digitize automatically mode processes everything that comes in, including documents that should not have been; Digitize on demand only leaves you in control. By default, Odoo digitises vendor bills automatically and waits to be asked for customer invoices.
Receiving bills by email
A journal can have its own receiving address. Any document sent to it becomes a draft bill, with no user having to step in.
- Open Accounting › Configuration › Accounting › Journals and select the purchase journal.
- Fill in the Email Alias: the part before the at sign: for example
bills. - Choose the Alias Domain to its right, which completes the address.
- Save.
Bills sent to that address now land in the journal, ready to be digitised.
Note
The pair of fields only appears on the journal if an alias domain is configured on the database. On a database hosted by Odoo it is there from the start; on a standalone installation it has to be declared beforehand, along with incoming mail handling.
Point d'attention
One bill per email: Odoo creates one document per message received, not one per attachment. An email carrying three bills gives a single draft bill with three attached files, and digitisation will only read the first.
Only PDF and XML files are interpreted. Other formats (images, spreadsheets) are attached to the document without being read.
Astuce
Give this address to your vendors, or set a forwarding rule from the accounts mailbox. Bills then come in by themselves, and the work is reduced to checking them and matching them to the purchase order.
Direct entry
- Open Accounting › Vendors › Bills.
- Click New.
- Select the vendor.
- Fill in the Reference (the vendor's invoice number) and the date of the document.
- Enter the lines, checking the expense accounts and the taxes.
- Confirm.
Note
Attaching the PDF received to the accounting document, by dragging and dropping it into the message thread, constitutes the supporting document for the expense and saves searching should you be audited.
Paying
- Open the confirmed vendor bill.
- Click Pay.
- Fill in the amount, the date, the bank journal and the payment method.
- Validate.
To prepare several payments at once, go through Accounting › Vendors › Payments.
Correcting: credit notes and refunds
Issuing a credit note
- Open the invoice to be corrected.
- Click Credit Note.
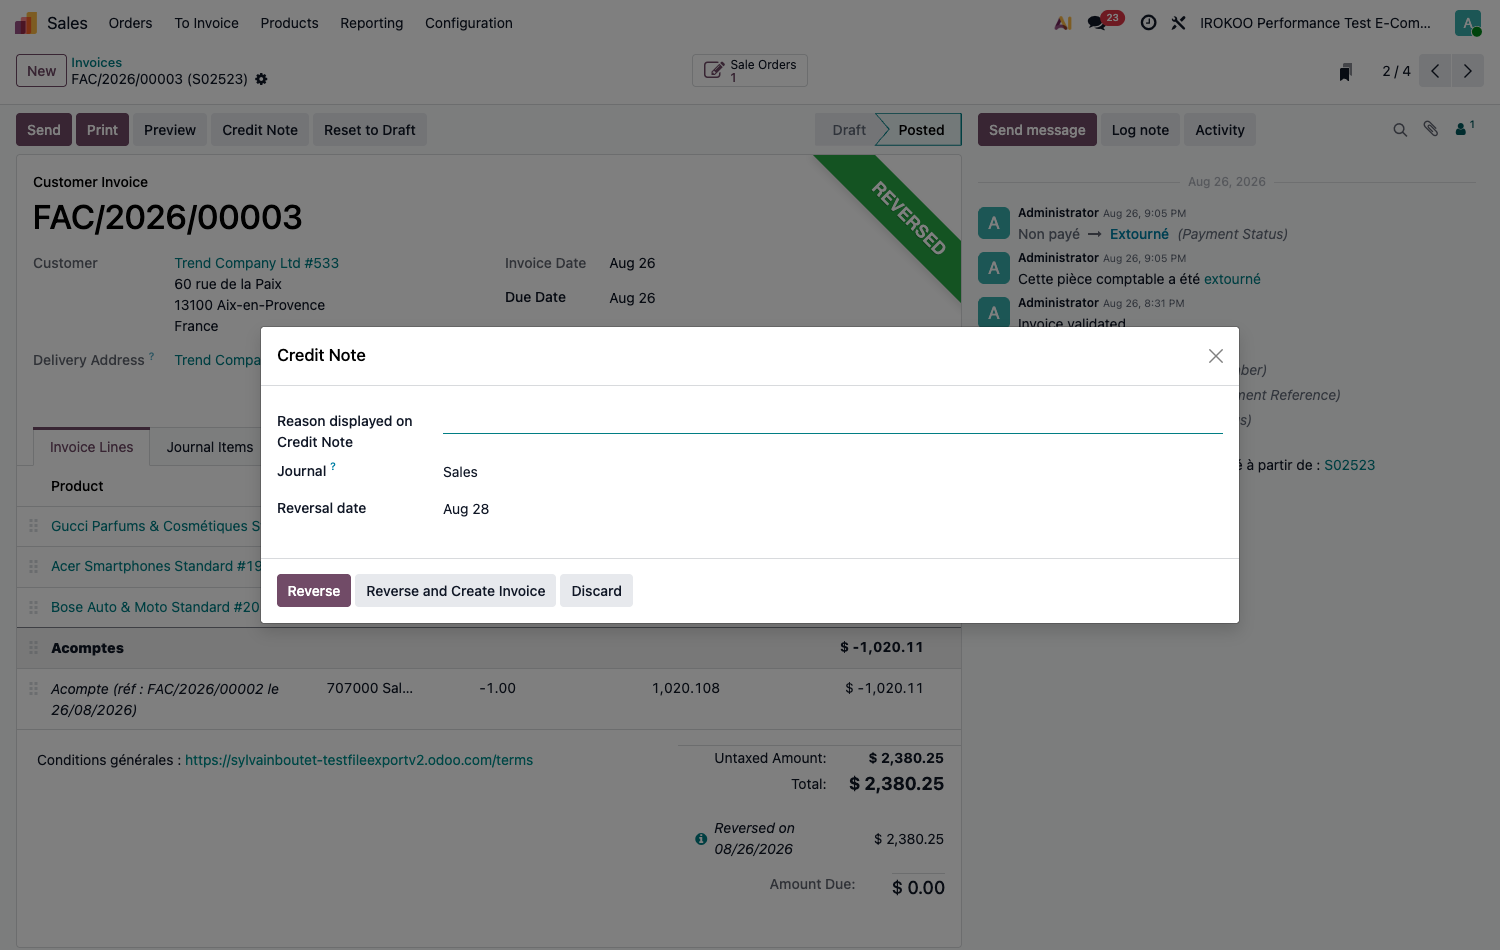
- Fill in the Reason displayed on Credit Note, which will appear on the document.
- Check the Journal and the Reversal date.
- Choose the appropriate option: - Reverse, simply to cancel the invoice; - Reverse and Create Invoice, to correct it and reissue straight away.
- Confirm the credit note obtained.
Settling the credit note
A posted credit note is a debt owed to the customer. Three routes extinguish it.
Refund it.
- Open the posted, unsettled credit note.
- Click Pay.
- Select the bank journal and the amount refunded.
- Validate.
Note
The Pay button disappears as soon as the credit note is settled. On a credit note that is already reconciled (the case of an invoice reversed after payment) it therefore never appears: there is nothing to refund.
It also changes appearance according to the situation: highlighted when refunding is the only way out, discreet when a credit is available to be applied. Odoo thus steers you towards applying it, which avoids a bank movement.
Apply it to an invoice. This is the most frequent case: rather than refunding, the credit note is deducted from another invoice for the same customer.
- Open the invoice the credit note is to be applied to.
- In the banner announcing outstanding credits, click Add beside the credit note you want.
- The amount comes off the Amount Due.
Let it apply itself to the original. When the credit note reverses an invoice that has already been paid, Odoo reconciles it by itself with the original payment: the credit note moves to Paid without any bank movement taking place, and the Amount Due falls to zero.
Note
A credit note marked Paid therefore does not mean that a refund has been made. It means that the debt is extinguished: by a transfer, by application to an invoice, or by reconciliation with the payment of the original invoice. The detail can be read in the message thread and in the Paid on line.
Astuce
Prefer application to refunding when the commercial relationship carries on: it avoids a bank movement, a statement line to reconcile, and a processing time at the customer's end.
Monitoring receivables
Spotting unpaid invoices
- Open Accounting › Customers › Invoices.
- Apply the filter matching what you are looking for.
| Filter | What it keeps |
|---|---|
| To pay | Invoices unpaid or partly paid, overdue or not. This is the customer exposure in the broad sense. |
| In payment | Invoices for which a payment has been recorded but not yet reconciled against the bank statement. They are neither to be chased, nor quite settled. |
| Overdue | Invoices whose due date has passed. This is the filter for follow-ups. |
- Group by Partner to measure the overall exposure on each account.
- Sort by Due Date to deal with the oldest arrears first.
Note
To pay and Overdue do not overlap: an invoice at thirty days issued yesterday is to be paid without being overdue. To chase, take Overdue; to measure the receivables position, take To pay.
Astuce
An invoice that sits in In payment signals a payment recorded with no bank counterpart: a payment entered twice, or a reconciliation forgotten. Go through this list at each month end: it is the best detector of cash anomalies (see section 14.3).
Chasing
Define the levels, once and for all.
- Open Accounting › Configuration › Invoicing › Follow-up Levels.
- Create the successive levels (polite reminder, firm chase, formal notice) filling in for each of them: - the Due Days, the number of days after the due date that triggers this level; - the email template used, and the Attach Invoices option to attach the documents concerned; - possibly an SMS, and Schedule Activity so that a reminder appears in the tasks of the person responsible.
Astuce
Three levels are enough in most cases: a reminder after a few days, a firm chase at fifteen days, a formal notice at thirty. Space them far enough apart to leave time for a payment already on its way.
Set the handling per customer, in the Accounting tab of their record: the tab is called Invoicing when only that application is installed.
| Field | What it governs |
|---|---|
| Follow-up Status | Computed: No action needed, In need of action when a level is reached, or With overdue invoices if invoices are past due without a level being owed yet. |
| Reminders | Automatic sends the follow-ups without any intervention; Manual prepares them and waits for validation. |
| Next reminder | A date before which no follow-up will go out. This is the field to fill in when a customer announces a payment: it suspends the follow-ups until the agreed date. |
| Responsible | The user in charge of collection on this account. |
A banner above shows the progress through the levels, and the Due smart button gives the amount to collect.
Send the follow-up. The Send link, beside the reminders, triggers the level reached: email, SMS or activity, according to what is set on that level.
Note
Follow-up handling belongs to the Enterprise edition, where it is available as soon as Invoicing is installed. In Community there are neither levels nor a follow-up report: monitoring is done from the invoice list, filtered on Overdue.
Point d'attention
The Automatic mode sends the follow-ups by itself, including to a customer with whom a negotiation is under way. Fill in the Next reminder as soon as an extension is granted, or switch that customer to Manual: a formal notice sent by mistake costs more than the arrears it pursues.
Invoicing reports
The Reporting menu of Accounting groups the reports by family. Four of them bear directly on the monitoring of invoicing.
| Report | What it shows |
|---|---|
| Invoice Analysis | Turnover invoiced, which can be broken down by customer, product, salesperson or period. This is the commercial steering report. |
| Aged Receivable | Receivables classified by how long they have been overdue, in columns of thirty days. This is the collection report. |
| Aged Payable | Payables classified the same way. This is the report that prepares payment decisions. |
| Partner Ledger | The detail of the movements on one third party, invoice by invoice and payment by payment. This is the report to open when a customer disputes a balance. |
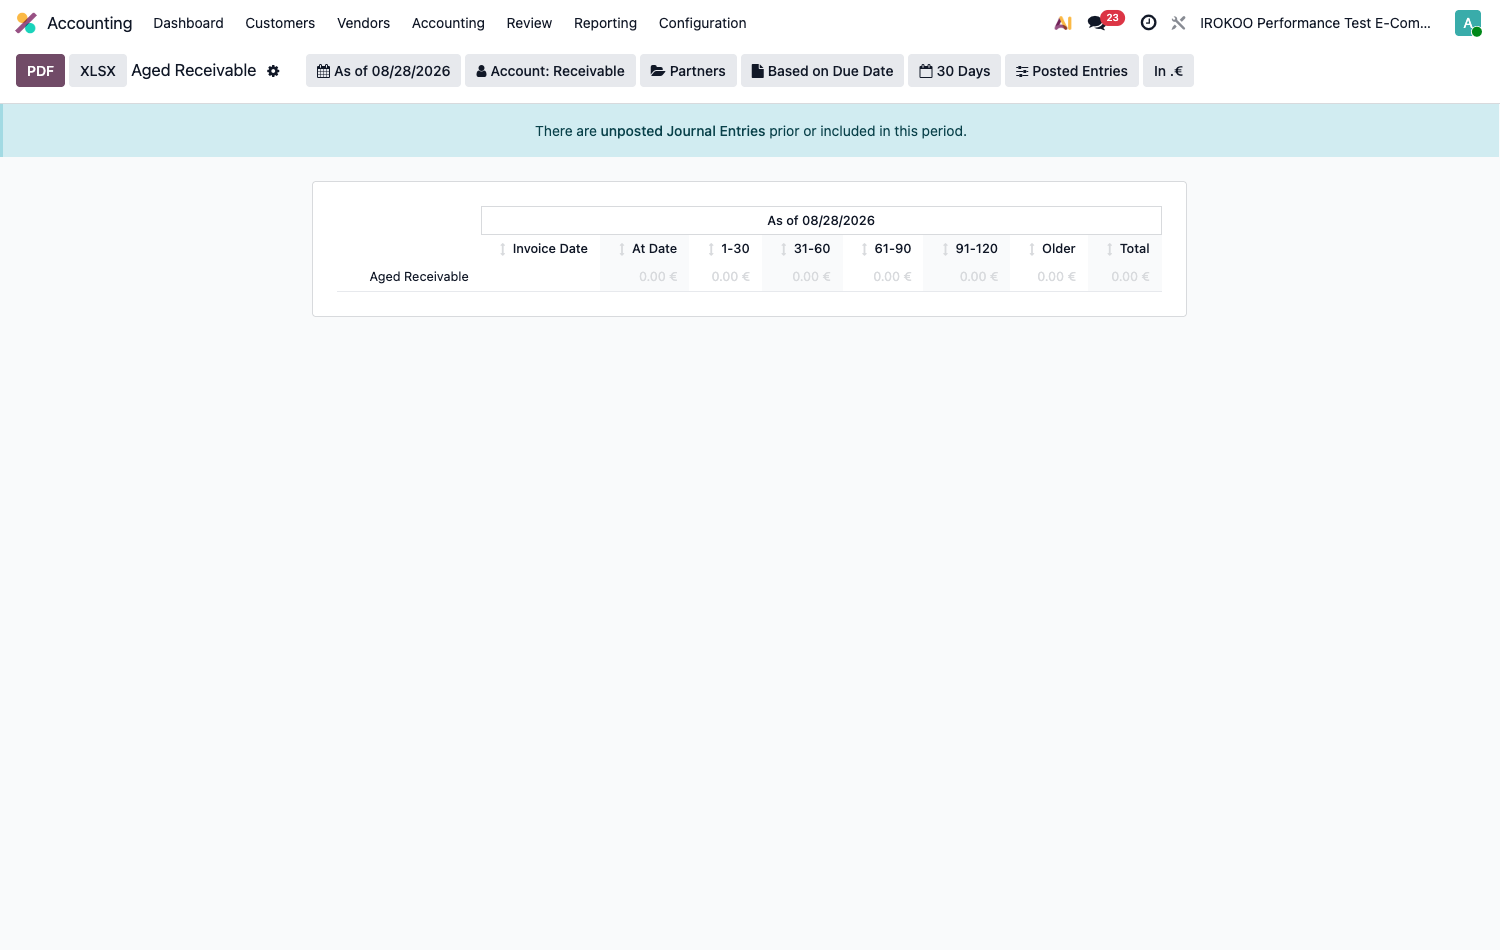
Note
These reports belong to the Enterprise edition, where they are available as soon as Invoicing is installed: with the exception of Invoice Analysis, which is present in Community. Without them, receivables are monitored from the invoice list, filtered on Overdue and sorted by due date.
Astuce
Aged Receivable is the one report to look at every week if you only look at one. It turns an abstract overall exposure into a list of named actions, and reads in a minute.
Note
The other families in the menu belong to bookkeeping and are covered in chapitre 14: the Statement Reports (balance sheet, profit and loss, cash flow statement), the Ledgers, and the Taxes & Fiscal reports.
Resolving common situations
The invoice is not in the right state
- Check its current status: draft, posted, in payment, paid.
- A draft invoice is confirmed with Confirm.
- A confirmed invoice to be cancelled goes through a credit note.
- An invoice showing in payment when the money has been received is waiting for its bank reconciliation.
- When in doubt, look at the message thread: it retraces every action carried out.
The taxes are wrong
- Check the customer's fiscal position: domestic, intra-Community, export, exempt.
- Check the taxes set on the products concerned.
- If the invoice is in draft, correct the taxes directly on the lines.
- If it is confirmed, issue a credit note and reissue a correct invoice.
A complete cycle, worked through
From the sale to the payment
- An order for 20 units at €100 is confirmed.
- The products are delivered and the delivery note validated.
- The invoice is generated from the order, for €2,000 excluding tax, and confirmed.
- It is sent to the customer by email.
- Fifteen days later, the customer pays by bank transfer; the payment is recorded.
- The transfer appears on the bank statement. There it is reconciled with the payment entered at the previous step, and the invoice moves to Paid.